How to Install and Configure nginx on Ubuntu

nginx is a hugely popular and successful web server, reverse proxy and load balancer, powering around one fifth of sites on the internet. But what is nginx and how do you install it on your Ubuntu server?
Why install nginx on your Ubuntu server?
Running a website is a fun, educational, and occasionally profitable experience, and Ubuntu is a solid and dependable base on which to build it. Whether you have a dedicated server, a VPS, or you're running it from your own home on old PC hardware, you need server software to handle incoming requests and return files. If you run more than one website, good server software can act as a reverse proxy - directing traffic to the correct virtual host, and as a load balancer.
While Apache is the most popular server software for Linux boxes, and we've used Apache when showing you how to turn old computer hardware into a server, nginx has been gaining ground fast since its release in 2017. nginx is easy to configure, and can serve dynamic as well as static content.
If you've just installed a recent version of Ubuntu on your server, log in using SSH:
ssh root@your.server.ip.address...and enter the root password when requested.
For security reasons, we don't advise using the root account to administer your server. Create a new, non-root user with its own home directory skeleton using the useradd command:
useradd -m new_usernameSet a password for you new user with:
passwd new_usernameAnd add the new user to the sudo group:
usermod -aG sudo new_usernameLog out of your server, then SSH back in with your new user credentials.
The first thing you need to do is update and upgrade all installed packages:
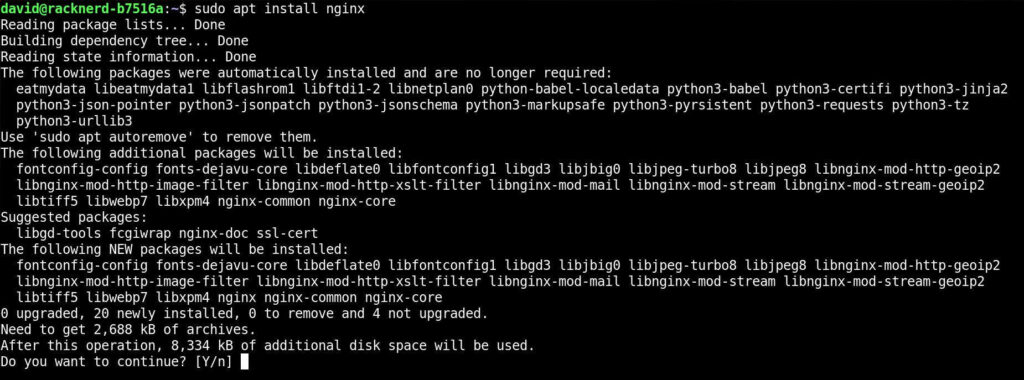
sudo apt update && sudo apt upgrade -yWith that out of the way, it's time to install nginx. The package is available in the default Ubuntu repositories and you can install it with:
sudo apt install nginxEntering:
nginx -v...will output the version of your newly installed nginx.
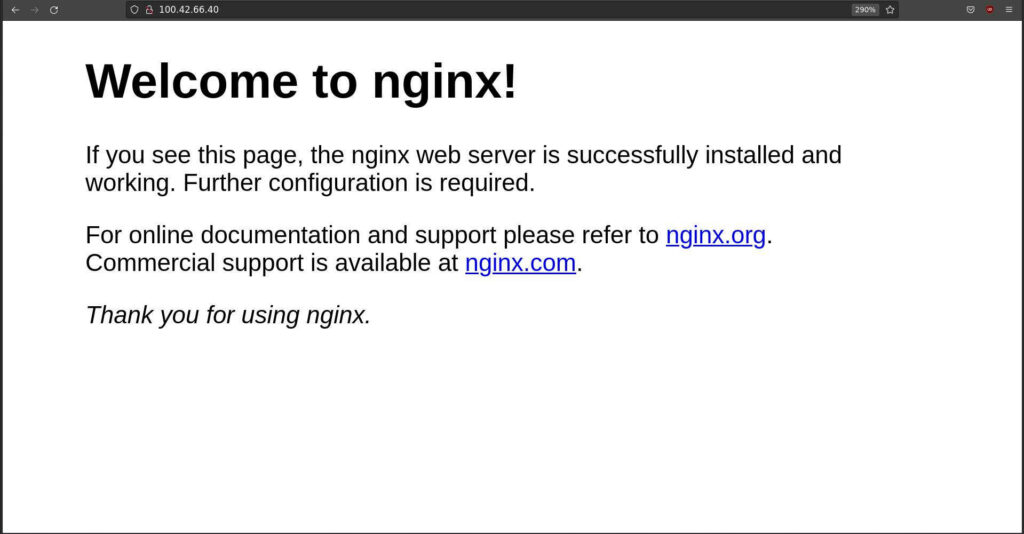
By default, nginx will serve HTML from /var/www/html, and during installation, a single file, index.nginx-debian.html, will be created in this directory. If nginx has installed correctly, the contents of the HTML file are displayed when you visit the IP address of your Ubuntu server. By default, nginx will start automatically when your server boots.
To make your own basic web page, use nano to create a new file called index.html
nano /var/www/html/index.htmlEnter your HTML content, then save and exit nano with Ctrl + O then Ctrl + X.
Your new page will take priority over index.nginx-debian.html, and will display when you refresh your browser.
How to configure nginx on Ubuntu
Displaying a single page when you visit the IP address of your server is cool, but there are multiple disadvantages to using naked IP addresses as a way to access content from a browser. Your nginx server should be able to appropriately deal with requests addressed to a particular domain. Or two. Or even more.
Before you start, you should choose and buy a domain name from a reputable registrar, or even grab a free domain name, and set a new 'A' type DNS record, with the host set to '@', and the value as the IP address of your server.
You can instruct nginx to listen for requests to your domain and serve content from a specific directory.
First, create a directory to hold your content. The new directory should be located in /var/www/
sudo mkdir /var/www/exampleNow create an index file:
sudo nano /var/www/example/index.htmlEnter your HTML content, then save and exit nano with Ctrl + O then Ctrl + X.
Navigate to /etc/nginx/sites-enabled and use nano create a new file:
cd /etc/nginx/sites-enabledsudo nano example
In the new file paste the following:
server {listen 80;listen [::]:80;server_name your-domain-name.tld;root /var/www/example;index index.html;location / {try_files $uri $uri/ =404;}}
This tells nginx to listen for requests on port 80; that the name of your server is your-domain-name.tld; that it is to deliver files from /var/www/example; that the main index page is named index.html; that if a file isn't found, it is to return a 404 status code. You should tailor these values to reflect your own system.
Save and exit nano with Ctrl + O then Ctrl + X.
To activate your new nginx configuration file, restart nginx with:
sudo service nginx restartYou can now visit your new site by entering your domain name into any browser.
Use Certbot to secure your website
If you visit your new site and look at the address bar of your browser, you'll notice a warning saying that the connection is not secure, or perhaps a small image of an open padlock. This means that your site does not have Transport Layer Security (TLS) enabled. Your traffic can be snooped by your ISP or other bad actors, and the connection is vulnerable to Man in the Middle (MITM) attacks.
Security certificates and encryption keys negate this danger, and you can use the certbot utility to fetch, deploy, manage, and renew keys and certificates for you.
Add the repository, then update:
sudo add-apt-repository ppa:certbot/certbotsudo apt update
Now install Certbot:
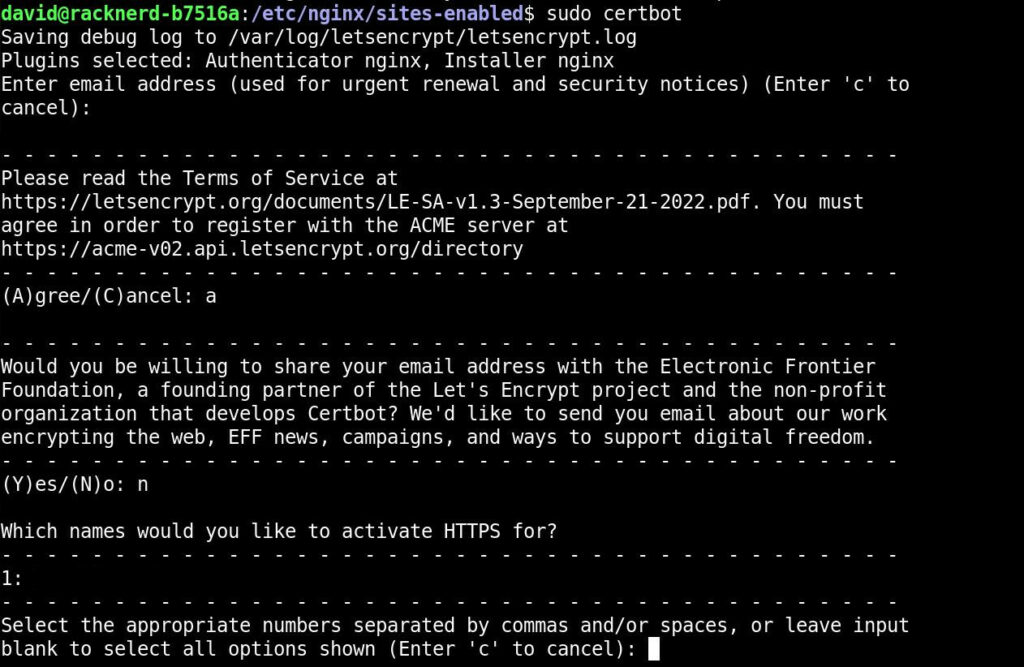
sudo apt install python3-certbot-nginxRun certbot with:
sudo certbot...and follow the prompts. When asked, "Which names would you like to activate HTTPS for", select the corresponding number from a list. Choose 'redirect', and Certbot will modify your configuration file to force all connections to upgrade to HTTPS.
Restart nginx once more with:
sudo service nginx restart...and refresh your site in the browser. You are now securely connected through HTTPS.
You successfully installed and configured nginx on Ubuntu!